The Floor
 More photos can be found the the photo gallery at the bottom of this page.
Old Floor
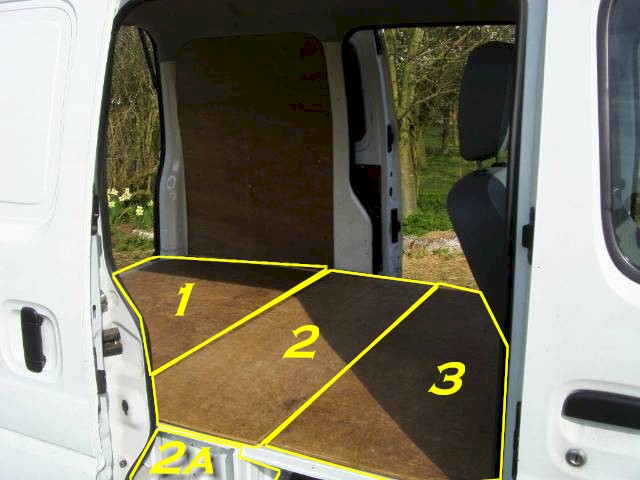
The carry is designed with a totally flat load-space design, which means that the wheel arches don't stick out into the load space. The floor area is divided up into 3 main sections - I have marked them out in the picture because there is often confusion as to which part is being described.
Section 1 at the rear is the actual floor of the van - under there is the rear axle, spare wheel, exhaust etc. This section cannot be lowered. Beware when drilling through there!
Section 2 - the mid section. This section is spot-welded and glued in place. It's optional to remove this section. It was originally designed to house the rear heater system and matrix if the van was to be used as a people carrier/mini-bus. If you are handy with an angle-grinder then this section can come out giving more leg room if you intend a bench type seat. If you intend having rear seats, then it might be more useful to keep this section to mount them upon. The space under the floor has access via two inspection covers on the floor, and one small opening at the front. If you are going to use that space, then you will need to allow for trap-doors to get to these holes. There are a couple of plugged holes out of that section through the real floor. I used these to pass the water pipe out to the water tank, and the waste water pipe from the sink.
Section 3 - The easiest part to remove. Suzuki designed this section to hinge back onto section 2 - in case the load was a little taller than the main space. It also creates the foot-well for rear seats. This section is bolted to the floor at the back of the drivers seats, and bolts in the hinges. Keep the bolts if you remove this as they might come in handy to secure new parts to the floor!).
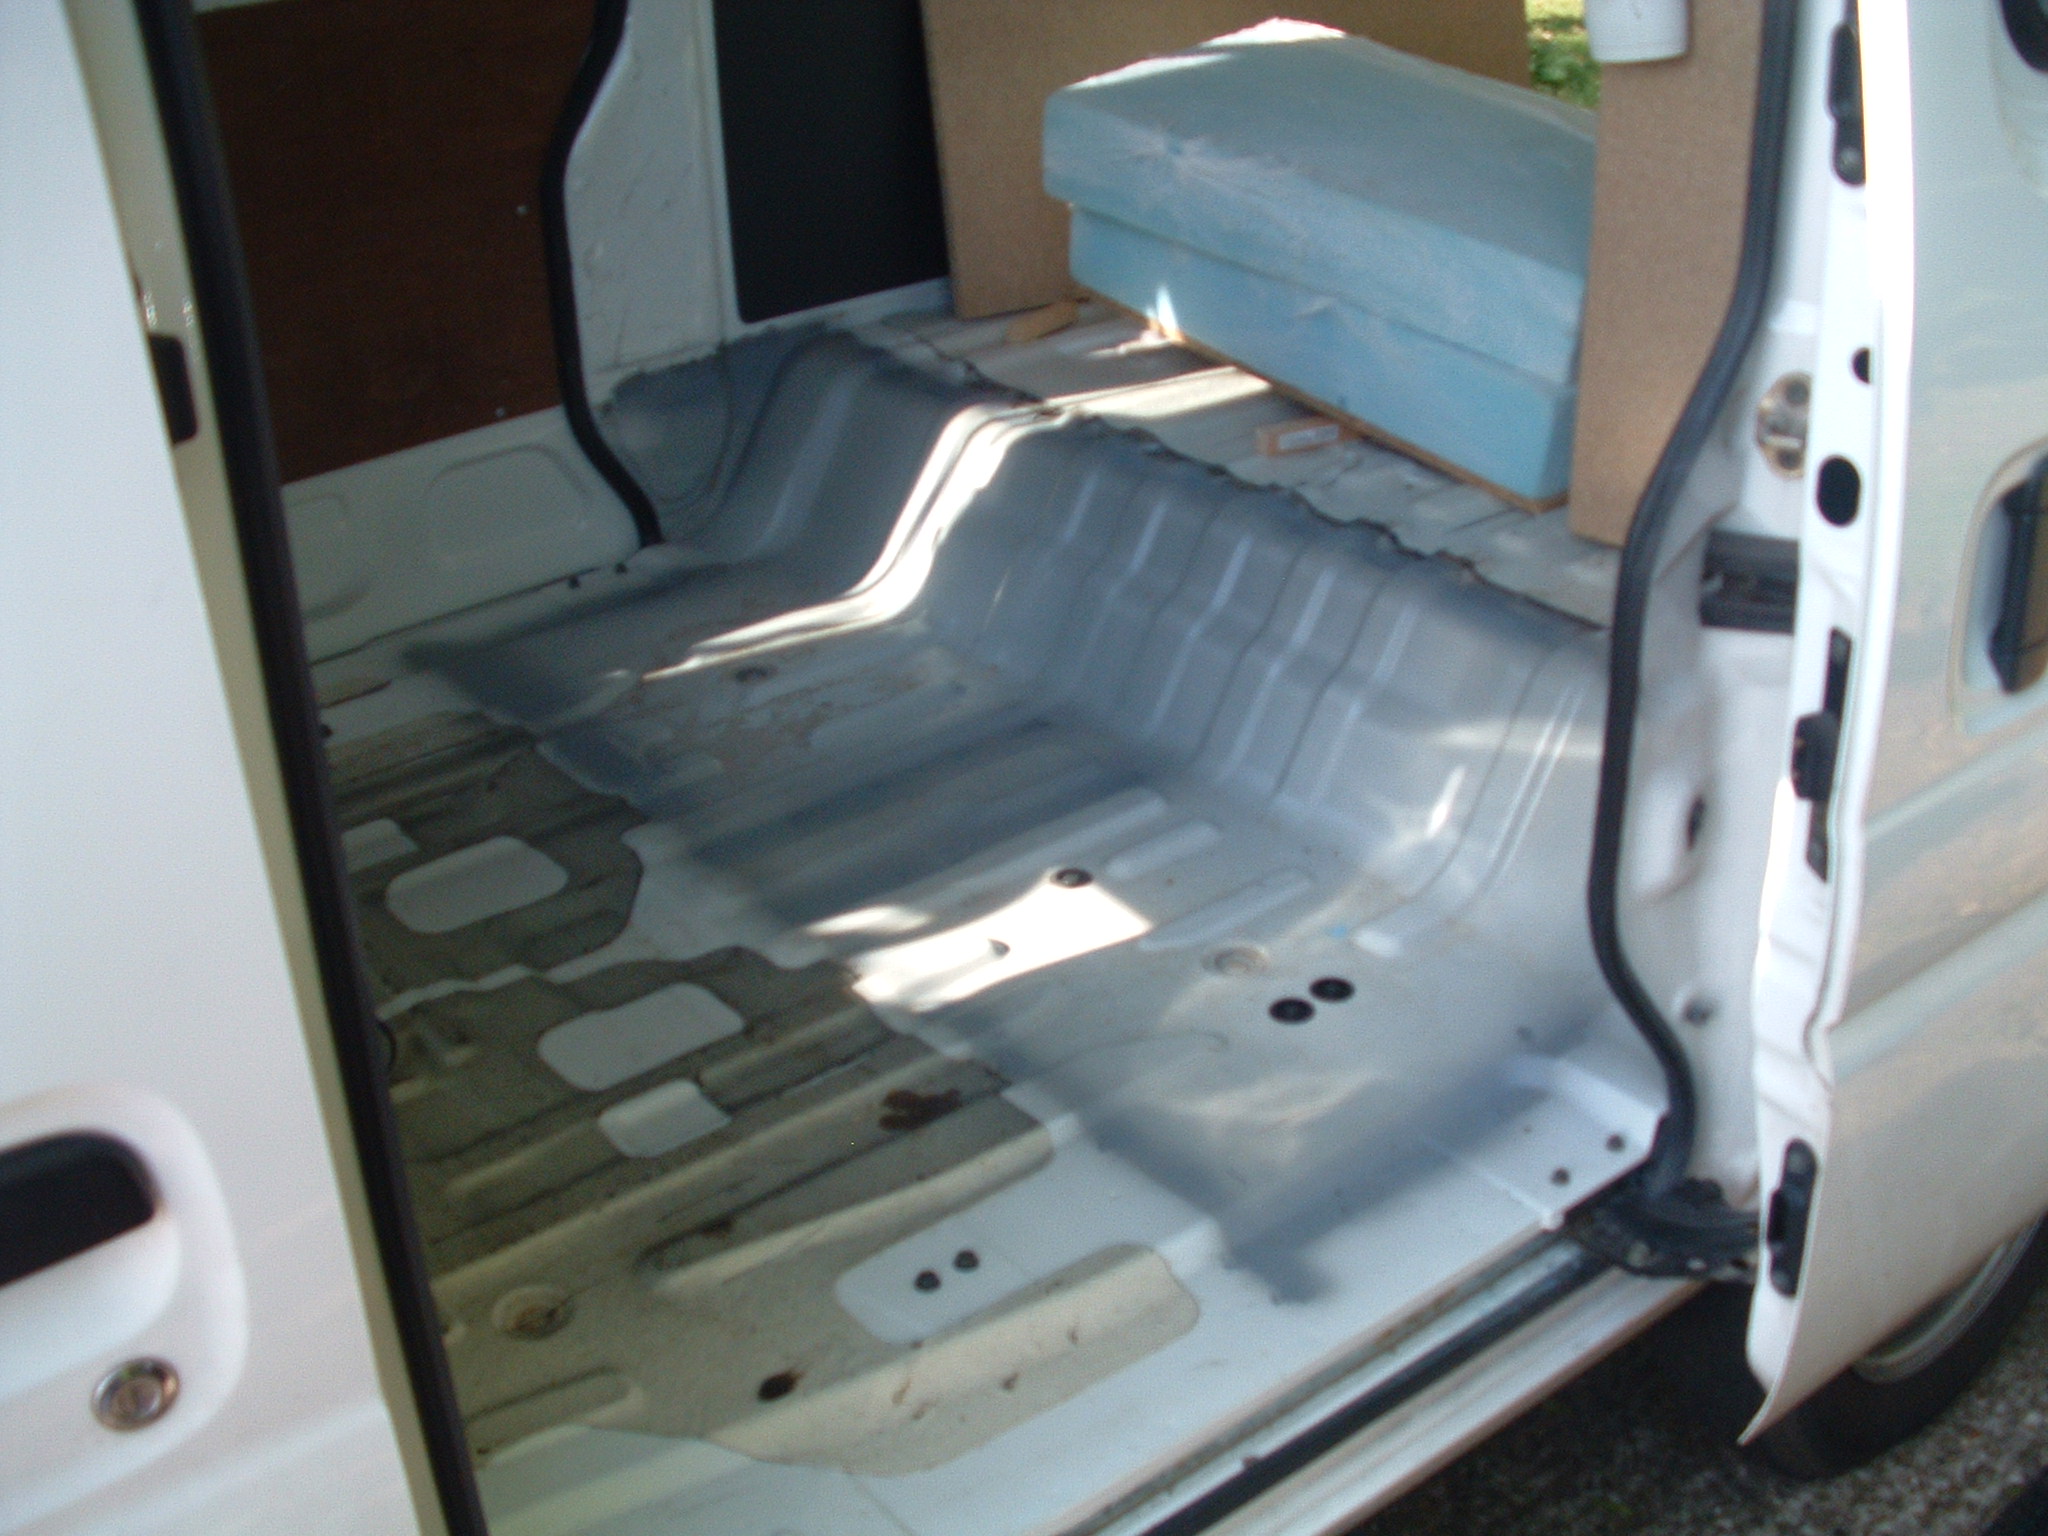 Here is a photo showing the actual floor of the van with the false floors removed. Look closely and you can see the plugged holes. I didn't have the abilities to remove the section so I paid a local body shop (Rackhams) to do the work for me. As they had never done this before, they quoted me a day's work. In actual fact it probably took less than that, but they were good enough to take on the job not knowing what they would find as they did it. Take the opportunity now to treat any rust you find in the old floor. After this, the floor will be fitted down securely, so if it isn't none now, it will be much harder later. Unfortunately I missed the opportunity and regret it a bit now. It's nagging in the back of my mind that there was a section I would have liked to treat.
New floor
Once you have decided which parts you are going to keep or remove then it's time to think about laying the new floor. Ply wood is probably the best wood to use as it gives a good strength/weight/thickness ratio. Marine ply might be considered as it would offer some water resistance - in case of spillages, wet feet etc.
Before you put the floor down, consider laying insulation between the metal floor and the plywood. Possibly the silver-bubble-wrap type insulation would work well here as it 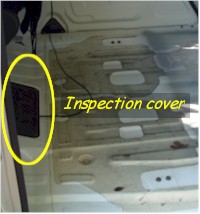 doesn't add much height, but gives some sort of protection from below. Again, I missed the opportunity, so I rely on the ply and carpet to do the job.
The floor of the van is ribbed for strength. This means that you may need to pack-out some of the sections of ply. It's important to pack out the leading edges of the entrances to the side doors. This is where all the weight of people climbing in and out is concentrated into a foot-print on the edge of the wood. You will probably find that the edge of your new floor ends where there isn't a ridge in the metal floor. I also put a metal strip along that leading edge as it finished the edge nicely, with a small strip of carpet covering the wood and the packing.
Important note! There is a small black inspection panel in the floor between the seats in the floor. This gives access to the top of the gear-box (I think). It's probably a good idea not to completely cover this panel when you lay the floor. Leave a way of accessing this panel just in case.
The floor was glued and screwed down with self-tapping screws (be careful where you drill holes through the floor!) As all the furniture will be screwed down to the floor, it is important to anchor it down well, otherwise you might end up wearing the sink at the end of an emergency stop!
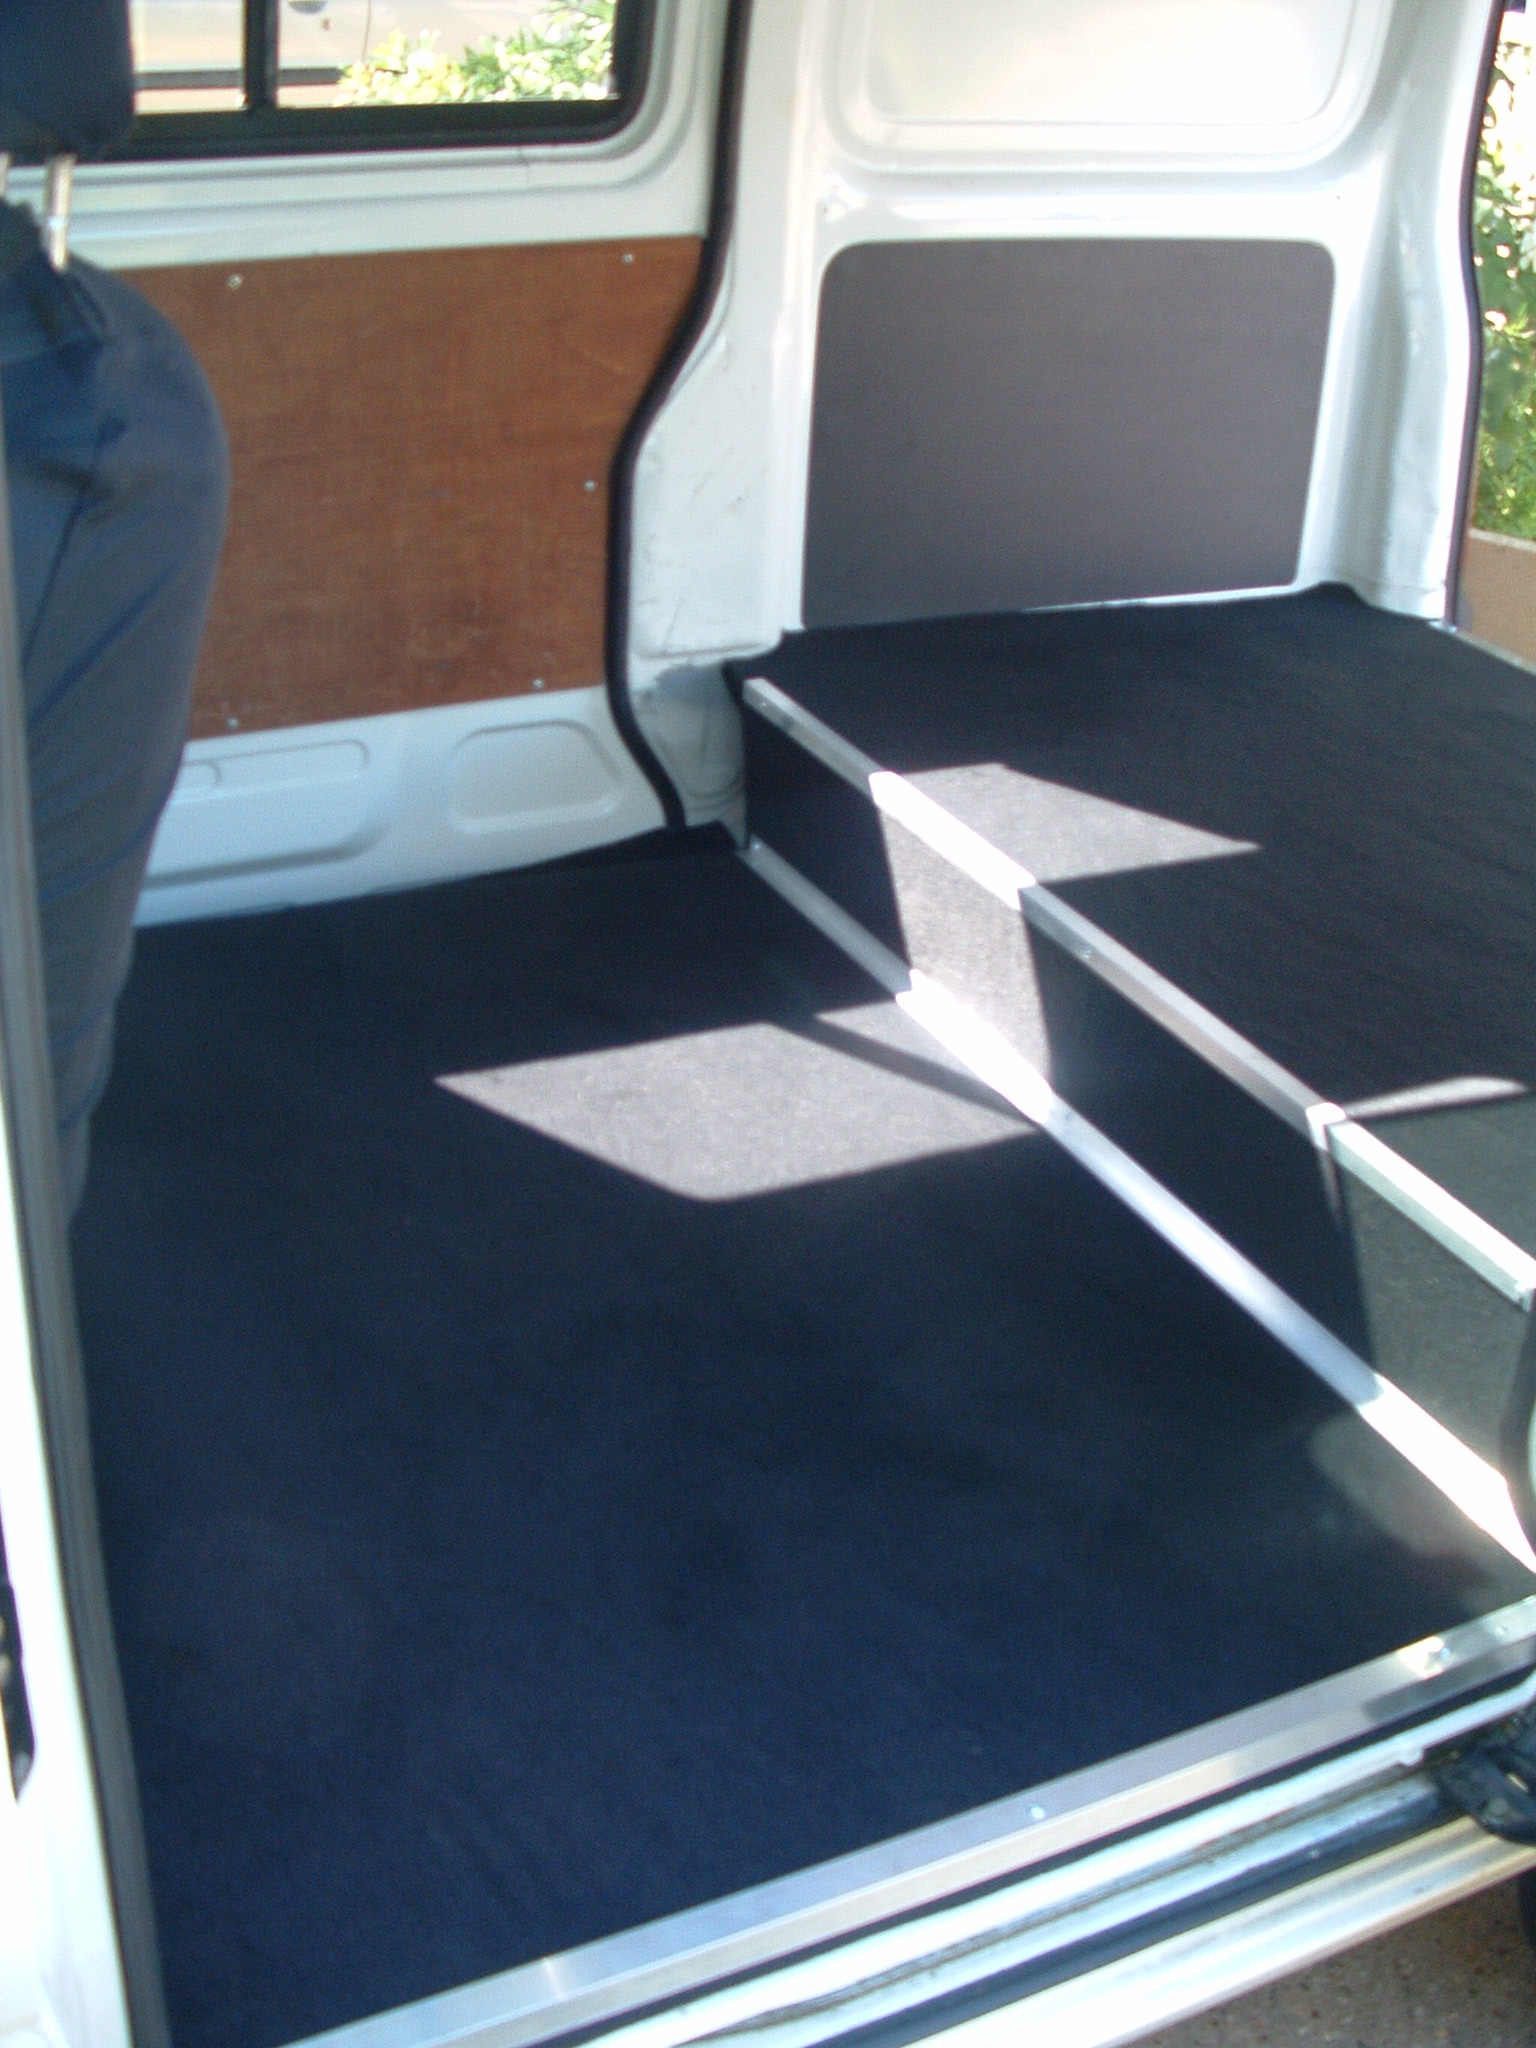 The removal of the false floor leaves a nice wave-shape where the floor rises up at the back. We decided to box this section off as it would make it easier to make the furniture fit a square shape rather than the wave. Some people leave the shape in place. We used the space behind the box section to run wires across the van from the power unit over to the kitchen unit.
I found some nice car boot-lining carpet (charcoal in colour) on ebay. I have looked since, but it no longer appears online. Carpet, lino, or even laminate flooring could be used. Again where the step is, we used right-angle aluminium trim to cover the joins.
The photo here shows the edge if the new carpet left untrimmed ready for any wires to be run in the corner of the floor. This edge will be covered by the furniture so was left loose.
Consider laying wires and pipes when laying the floor, or at least include conduit or pipes to allow for wires to be passed through later on.
The Floor
Click on an image to open the image gallery


